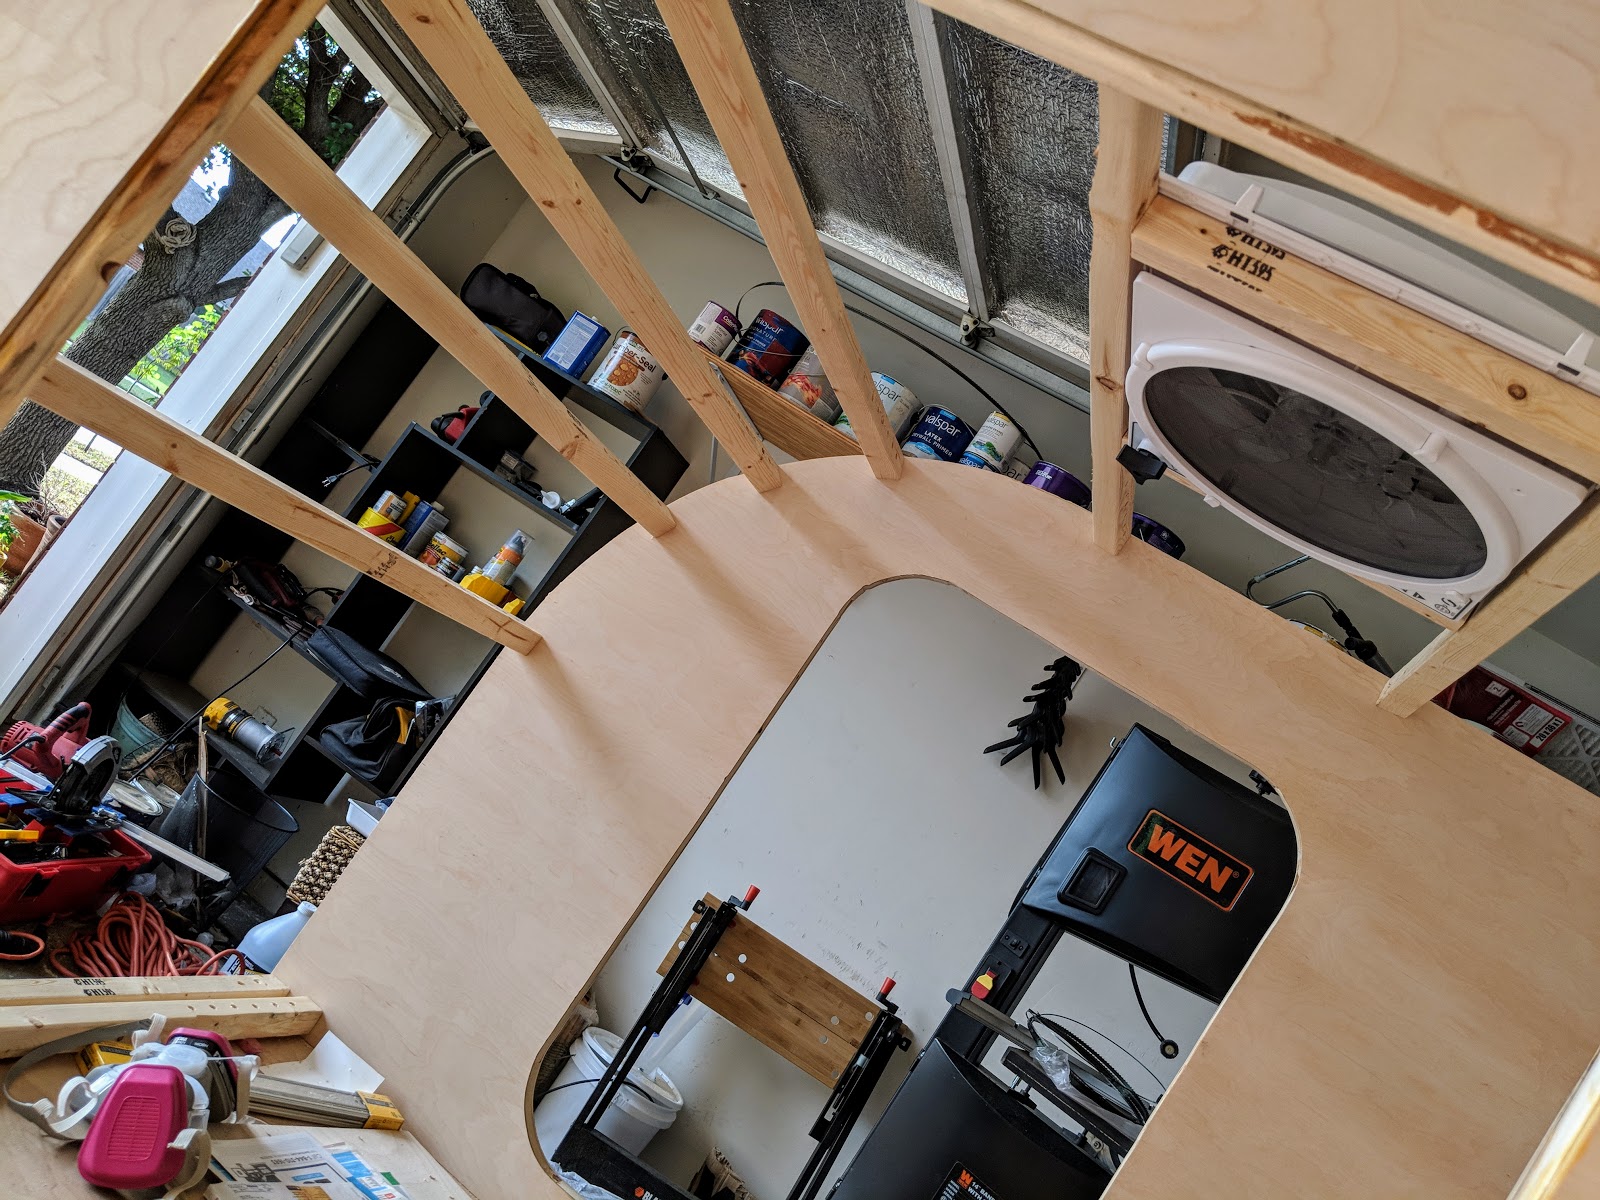
Yesterday we glued together our 1/2" plywood pieces and clamped them together. We then used our 1/4" plywood to inset the galley hatch frame while constructing it so we had room to freely move the finished hatch up and down.
We cut our top and bottom spars and glued them and held them til it dried with nails driven in at an angle. (Spoiler alert- it didn't work.)
While the glue was drying we tackled some more electrical work. We soldered and connected the other reading light and prepped the fan wiring and the dome light wiring. The second reading light is broken so we had to order a replacement light so we can't put the roof on until we get it.
We purchased the 2 1/3 cubic foot tongue box from Harbor Freight and it's perfect for our needs. We drilled holes in it for the existing bolt and extra holes for the U-bolts from underneath. Dan built a wooden platform for the tongue box to sit on and I sealed it with our low VOC wood sealer.
After the hatch frame was "dry", we pulled it out and the nails didn't hold the glue so it snapped apart. We decided to reinforce it by cutting two more ribs and gluing them together. That way we would have two , 1/2" ribs glued together on the outside and two, 1/2" ribs on the inside. The upper and lower cross beams of the hatch are 1 1/2" thick so in order to fit the interior ribs in, we had to cut them down that length on either side.
We had to head to the FC Dallas game and it was super hot so we took plenty of breaks. Got around 4 hours of work in.
Time spent Day 23: 4 hours
Total hours spent: 87 hours
Day 24 was spent entirely on hatch work. We installed the vertical and horizontal pieces on the outside and then measured and cut the center two beams. We predrilled all our holes and used 2" screws on the vertical ribs and 1 1/2" screws on the horizontal beams.
We used a square to make sure the hatch wasn't going to be all wonky shaped and shown here is all the pieces installed except the center two beams.
We did a dry fit and lost our 1/4" gap. :(
We removed the right side cross beams and shaved them down 1/4" or so.
Before installing them back in we decided to do a dry fit of the hurricane hinge from Vintage Technologies.
We had to cut down the underside that attaches to the galley hatch so it sits inside of the sidewalls.
Since we didn't notch our sidewalls down, we have an offset hinge that allows the hatch door to sit up 3/8" so we can install the trim and galley hatch seals have room for the door to close and latch.
IT OPENS AND WE HAVE OUR 1/4" GAP!!
You can see here where I cut a notch out of the hinge. The part inside that is in focus used to be flush with the entire end but it wouldn't fit inside the sidewalls so I took a hacksaw saw and chopped out a rectangular piece. (Not recommended. Terrible sound.)
We messed around some with some little things for awhile before we called it quits for the weekend. Happy with what we got accomplished and looking forward to getting this bad boy finished up soon!!
Time spent Day 24: 7 hours
Total project hours: 94 hours
Sunday, June 3, 2018
Friday, June 1, 2018
Day 22: Interior Cabinets and Hatch Part I
This was a very productive day!! Went to Home Depot and got another 4'x8' sheet of 1/2" plywood to start the hatch and to build a frame for the interior cabinets. I got about 5 hours of busywork done while Dan was at work since I had today off.
I drew out the dimensions and had a 1" frame. Cut it all out and found out that it wasn't going to work due to our light placement. This is the second time I've messed up or broken the cabinet frame and was basically fed up with it.
Since I didn't want to figure out the frame business again, I took 20 minutes to make another set of sliding doors in the same three-sided aluminum that I used in the galley for the cabinets.
I used the 1/8" plywood so the doors would slide freely past each other. It's very thin wood and I'm expecting it to warp. I'm going to coat it in the sealant and press it while it dries in hopes it hardens flat. Who knows what's going to happen. All I care about right now is that I have cabinets. :)
I used the drill press to pre-drill holes into the angle iron and the three-sided aluminum piece. The reason I used the drill press was because I was using the hand held drill and managed to snap the drill bit in half!
I used 1/2" screws to attach the three-sided aluminum on top of the angle iron and into the shelf and did the same into the roof with just the three-sided piece. Then used the 1" spade bit to drill holes so we can slide the doors open and closed.
After the cabinet business was done it was time to move on. (I still have to seal it, but I was losing focus so decided to move to a different part of the project...the dreaded hatch.)
We've been researching hatch stuff for what feels like forever and it's still a daunting task. The folks at Vintage Technologies were incredibly helpful sourcing everything I needed to finish the TD and getting it sent to me ASAP. (Everything was at my front door within 5 days and shipping was reasonable.) I clamped the wood up against the side of the TD and drew the first line to begin my template. I then built a little tool and drilled a hole in it 1 1/2" down and slid it along the top of my cut with a pencil in the hole so my template rib was 1 1/2" thick. The photo shows what I built.. Hard to explain I guess.
Once I got the template rib cut out with the jigsaw I clamped it to the galley wall and did a bit of sanding to make sure it was flush with the wall. Then traced it 5 times (for a total of 6 ribs).
We got all the ribs cut out with the jigsaw. (Using the router would have been impossible with the way the clamps were situated so we figured this would cause much less drama in the garage.
Once the 6 were cut out I fit them against the sides and made sure the all matched (mostly.. it's not easy perfectly matching 6 hand cut boards). We then glued two together on each side as those will take most of the weight on the gas struts we will install and the remain two ribs will run down the center as shown.
Tomorrow is Saturday with a high of 107 degrees. Yay Texas! We're hoping to get a lot of work done on the hatch and the electrical. Fingers crossed we don't roast!
Time spent today: 7 hours (including 2 home depot trips)
Total time spent: 90 hours
I drew out the dimensions and had a 1" frame. Cut it all out and found out that it wasn't going to work due to our light placement. This is the second time I've messed up or broken the cabinet frame and was basically fed up with it.
Since I didn't want to figure out the frame business again, I took 20 minutes to make another set of sliding doors in the same three-sided aluminum that I used in the galley for the cabinets.
I used the 1/8" plywood so the doors would slide freely past each other. It's very thin wood and I'm expecting it to warp. I'm going to coat it in the sealant and press it while it dries in hopes it hardens flat. Who knows what's going to happen. All I care about right now is that I have cabinets. :)
I used the drill press to pre-drill holes into the angle iron and the three-sided aluminum piece. The reason I used the drill press was because I was using the hand held drill and managed to snap the drill bit in half!
I used 1/2" screws to attach the three-sided aluminum on top of the angle iron and into the shelf and did the same into the roof with just the three-sided piece. Then used the 1" spade bit to drill holes so we can slide the doors open and closed.
After the cabinet business was done it was time to move on. (I still have to seal it, but I was losing focus so decided to move to a different part of the project...the dreaded hatch.)
We've been researching hatch stuff for what feels like forever and it's still a daunting task. The folks at Vintage Technologies were incredibly helpful sourcing everything I needed to finish the TD and getting it sent to me ASAP. (Everything was at my front door within 5 days and shipping was reasonable.) I clamped the wood up against the side of the TD and drew the first line to begin my template. I then built a little tool and drilled a hole in it 1 1/2" down and slid it along the top of my cut with a pencil in the hole so my template rib was 1 1/2" thick. The photo shows what I built.. Hard to explain I guess.
Once I got the template rib cut out with the jigsaw I clamped it to the galley wall and did a bit of sanding to make sure it was flush with the wall. Then traced it 5 times (for a total of 6 ribs).
We got all the ribs cut out with the jigsaw. (Using the router would have been impossible with the way the clamps were situated so we figured this would cause much less drama in the garage.
Once the 6 were cut out I fit them against the sides and made sure the all matched (mostly.. it's not easy perfectly matching 6 hand cut boards). We then glued two together on each side as those will take most of the weight on the gas struts we will install and the remain two ribs will run down the center as shown.
Tomorrow is Saturday with a high of 107 degrees. Yay Texas! We're hoping to get a lot of work done on the hatch and the electrical. Fingers crossed we don't roast!
Time spent today: 7 hours (including 2 home depot trips)
Total time spent: 90 hours
Day 20-21: Sealing the Interior and Exterior Plus Some Electric
Day 20 came after a long break of traveling and a bit of TD burnout. We got some spar varnish in high gloss and I did three coats on the exterior paint with a light sand in between coats with 220 grit sandpaper. Since it's so hot, the coats dried relatively quick with added airflow from a box fan.
Time spent Day 20: 3 hours
Total time spent: 80 hours
Day 21 we installed the interior reading lights and connected them by soldering the wires and covering it with heat shrink tube and then wrapping in tight in electrical tape.
Our friend, Fallon helped me install the interior trim door rings so we can get the mattress in there before putting on the outside portion of the doors. After the door trim ring was on, I sealed everything inside with the Low VOC sealant that I mentioned in an earlier post. It helps harden the wood and pops the grain. We're happy with how that is looking.
We ordered a custom spring mattress made in the USA by a company called LoveMyMattress. Their customer service was excellent and we ended up order a 44" x 75" mattress that should fit perfectly inside of the TD.
Time spent Day 21: 3 hours
Total time spent: 83 hours
Time spent Day 20: 3 hours
Total time spent: 80 hours
Day 21 we installed the interior reading lights and connected them by soldering the wires and covering it with heat shrink tube and then wrapping in tight in electrical tape.
Our friend, Fallon helped me install the interior trim door rings so we can get the mattress in there before putting on the outside portion of the doors. After the door trim ring was on, I sealed everything inside with the Low VOC sealant that I mentioned in an earlier post. It helps harden the wood and pops the grain. We're happy with how that is looking.
We ordered a custom spring mattress made in the USA by a company called LoveMyMattress. Their customer service was excellent and we ended up order a 44" x 75" mattress that should fit perfectly inside of the TD.
Time spent Day 21: 3 hours
Total time spent: 83 hours
Wednesday, May 16, 2018
Days 18-19: Painting the Exterior
While we are waiting for our custom mattress to arrive, I decided to take some time to draw up and paint the exterior. I'm not head over heels in love with it, but I don't hate it either. I wanted to go this route so that if we end up with a fleet of them, we can have different scenes so they look good together.
Total time spent today: 8 hours
Total project hours: 77 hours
Total time spent Day 18: 8 hours
Total project hours: 69 hours
Day 19 was spent painting all day again. I put a layer of the lumber-seal on before the paint as well. I plan on doing two coats of that sealant post painting and then 2 coats of high gloss polyurethane.
I decided to change some things and add some things but I think this is roughly what it's going to look like!
Got a couple of hours starting the driver's side, too!
Total time spent today: 8 hours
Total project hours: 77 hours
Wednesday, May 9, 2018
Day 17: Doors Have Arrived!!
We ordered custom made 26x36" doors from Challenger Doors a couple weeks ago and they just arrived and they fit!! Spent some time playing around with them in the garage. They lock from both the inside and the outside so tbats pretty handy. We didn't do any actual work today but wanted to share photos!
We also decided to source our 4x10' aluminum for the roof from Discount Steel for $62 a sheet. It is the best price we've found in the metroplex, by far. Going to pick it up next week and start working on our hatch and finish up the interior.
Monday, May 7, 2018
Days 15-16: Running the Wiring and Learning Lessons
We were so jazzed up from our last time working on it and the progress we made that we set a bit too high of expectations. Day 15, we ran the wiring we got from Home Depot through the TD. Six wires, 1-Inverter 2-Fan 3-Dome Light 4-Solar (Surprise!! We will be installing a permanent solar panel on the roof!) 5/6- Reading lights.
We labeled the ends so we knew what was going where.
Actually not convinced we got much more done today except for installing the base of the interior cabinets. Oh! We routed out the hole in the interior ceiling for the fan to sit in. Even wearing safety glasses Dan managed to get a chunk of wood in his eye. He also is super weird about things in his eye so trying to flush it out wasn't the easiest of tasks. Doctor Danielle to the rescue though since we finally got it out after taking my bottle of saline and flushing it up under his eyelid.
Also, we fit!
Total time spent Day 15: 3 hours
Total project hours: 57 hours
Day 16 was a rubbish day. We spent around 4 hours trying things and failing and not able to get cabinetry hardware to work. All we have to show for Day 16 is that we got our dome light installed. (Which was the easiest part of the entire project thus far.) Here's hoping our next work day is a better day! Taking a few days to recuperate from being burnt out of TD work. We've logged 60 hours in probably 2 weeks.
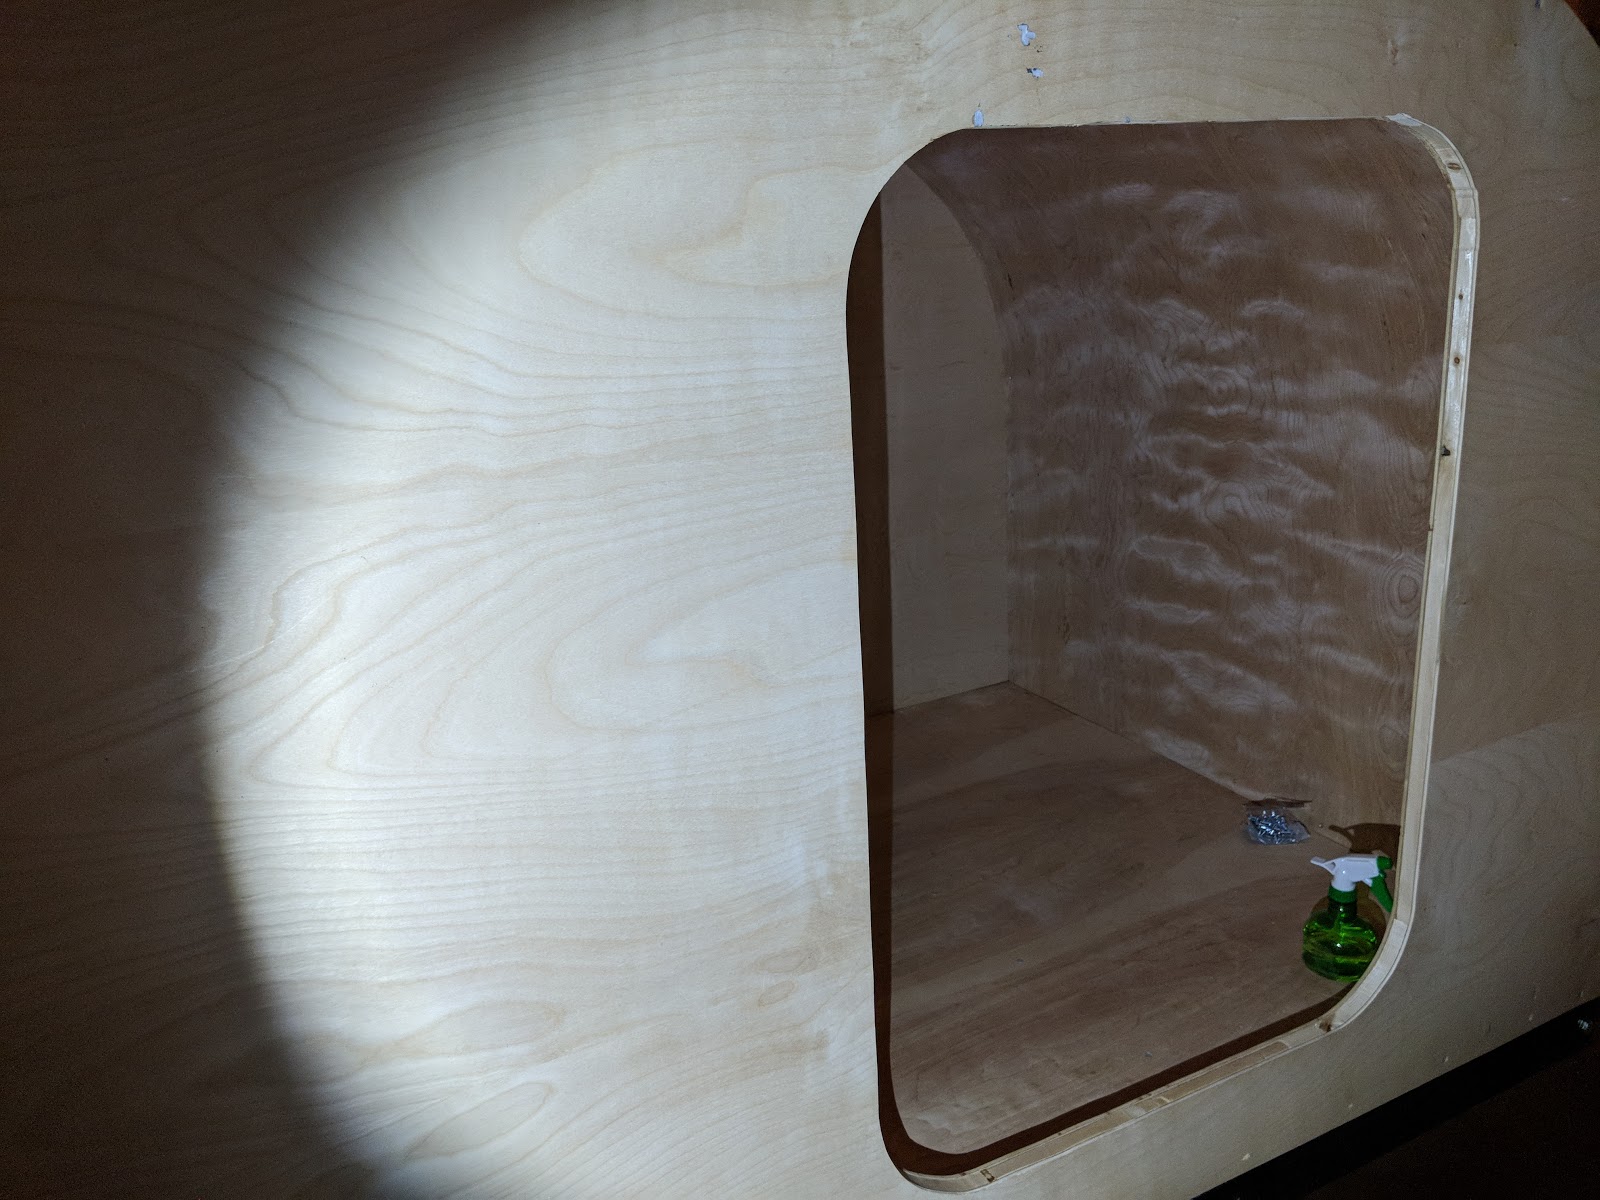
Time spent Day 16: 4 hours
Total project hours: 61 hours
Friday, May 4, 2018
Days 13-14: Installing Spars and Interior Ceiling
Day 13 was May 2, which happened to be our third wedding anniversary!! Of course we spent it getting some quality TD work done.
Cut our spars to 46 3/8" and installed them 12" apart on flat areas and 6-8" apart along the curve. I used the drill press and the 3/8" spade bit and drilled six holes into each spar so we can run the wiring through the ceiling.
Spars were installed with a 2" exterior screw through the outside except for the bottom two spars. We used pocket holes and installed them inside out since the bottom half of the exterior will be exposed since we are doing a two tone design.
We got our Maxx Air fan the other day and it fits the 14"x14" framing we built for it. Since our roof is not going to be the minimum 2' thickness, we will be building a small interior frame to help with the depth of the fan.
Total time spent Day 13: 2 hours
Total project hours: 50.5 hours
Next day we put in our interior ceiling! The width of our interior is exactly 46 1/2" so we took the circular saw and attached the guide and buzzed off 1 5/8" so we had a bit of wiggle room. Our radius is 25" so we figured we could bend our board vertically instead of horizontally so we would have less waste. 1/8" plywood (luan) bends better one way than the other.
And we found the bad way.
Next piece we took much slower and had to wet it to get it to bend along the spars. Still regret doing it vertically as it was a nightmare trying to get it to move with the friction of the ceiling. Once I got it an inch or so away, Dan applied the polyurethane glue and I got it against the spar and installed a 3/4" screw on each end of the spar close to the interior walls.
In one frustrated effort, I managed to crack it. 🤦🏻♀️ I'm thinking about putting in a strip of wood like I was covering a seam to cover it up. It's also not crazy noticeable if I don't shine line directly on it. It didn't fully crack on the inside so I slathered glue all up in the crack and it seems pretty stable since it had time to dry.
Total time spent Day 14: 3.5 hours
Total project hours: 54 hours
Cut our spars to 46 3/8" and installed them 12" apart on flat areas and 6-8" apart along the curve. I used the drill press and the 3/8" spade bit and drilled six holes into each spar so we can run the wiring through the ceiling.
Spars were installed with a 2" exterior screw through the outside except for the bottom two spars. We used pocket holes and installed them inside out since the bottom half of the exterior will be exposed since we are doing a two tone design.
We got our Maxx Air fan the other day and it fits the 14"x14" framing we built for it. Since our roof is not going to be the minimum 2' thickness, we will be building a small interior frame to help with the depth of the fan.
Total time spent Day 13: 2 hours
Total project hours: 50.5 hours
Next day we put in our interior ceiling! The width of our interior is exactly 46 1/2" so we took the circular saw and attached the guide and buzzed off 1 5/8" so we had a bit of wiggle room. Our radius is 25" so we figured we could bend our board vertically instead of horizontally so we would have less waste. 1/8" plywood (luan) bends better one way than the other.
And we found the bad way.
Next piece we took much slower and had to wet it to get it to bend along the spars. Still regret doing it vertically as it was a nightmare trying to get it to move with the friction of the ceiling. Once I got it an inch or so away, Dan applied the polyurethane glue and I got it against the spar and installed a 3/4" screw on each end of the spar close to the interior walls.
In one frustrated effort, I managed to crack it. 🤦🏻♀️ I'm thinking about putting in a strip of wood like I was covering a seam to cover it up. It's also not crazy noticeable if I don't shine line directly on it. It didn't fully crack on the inside so I slathered glue all up in the crack and it seems pretty stable since it had time to dry.
Total time spent Day 14: 3.5 hours
Total project hours: 54 hours
Subscribe to:
Posts (Atom)
Day 36: Finishing Touches II
We're still working on some little things. Built a plate holder and tiny silverware box for the cubby in the galley with extra 1/4...