Today was one for the books! After getting started, we had our only fluke (the front of the aluminum didn't quite adhere and popped off) but the rest of the day went completely in our favor! We kept working to get tons done.
We cut the 4'x8' aluminum sheet down to roughly the size of the hatch and cut it with the jigsaw. (It worked eons better than cutting the diamond plate.)
After that was done, I applied a liberal amount of contact cement and we let it dry for 15 minutes and then put the aluminum on and clamped it since the strap was being used on the teardrop.
The aluminum had popped up in the front of the teardrop so we took an aluminum trim piece and installed it on top of the aluminum and diamond plate to hold it in place.
We finally got to put on the trim! We first ran butyl tape for a waterproof seal on the edge of the whole side and then place the trim on and pre-drill through the aluminum and into the sidewall. Dan then drove 1 1/4" exterior screws into the molding every three inches. After cleaning it all up and using a scraper to clean the butyl tape that pushed out from under, we added the black trim and we were done with one side.
Knocked out side two in about half hour since Dan had to keep changing bits.
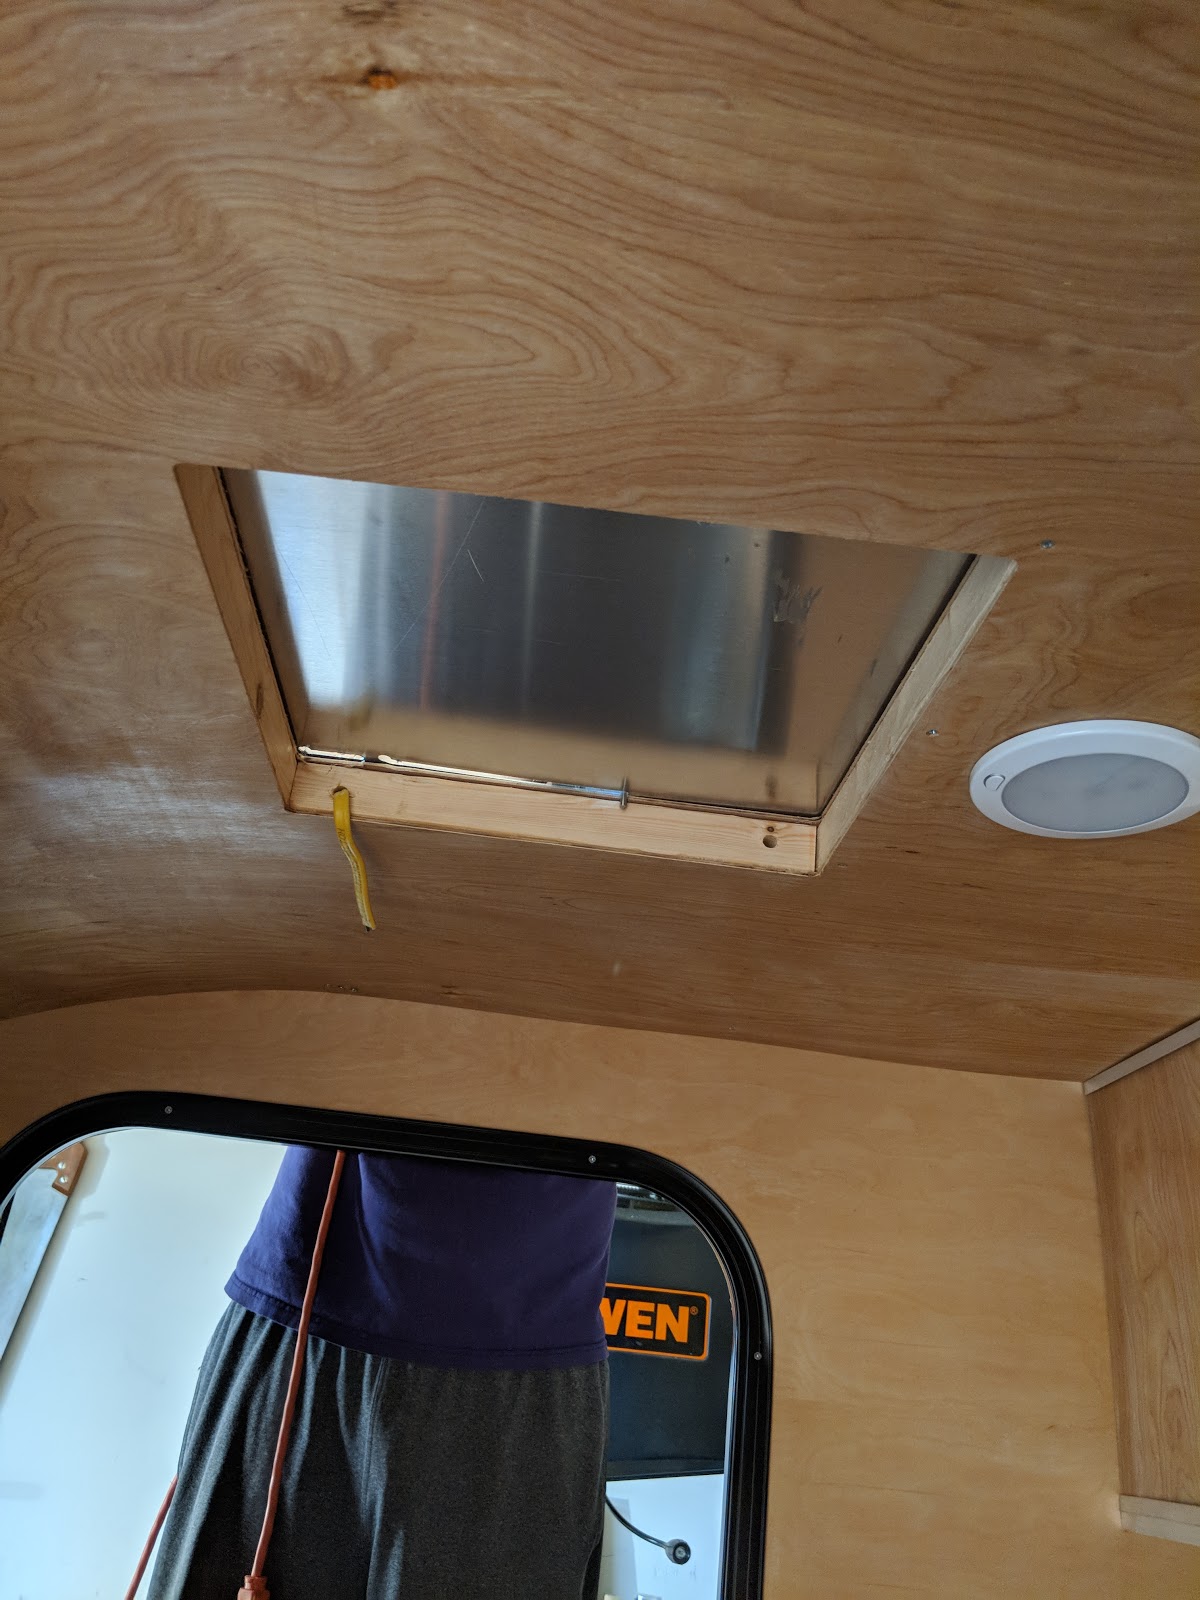
Last step with the roof was to route out the hole the MaxxAir fan is going to sit in. You always need to have air flow in a teardrop as since it's a small, airtight space, it can totally kill you. No bueno.
We used the recommendation from Vintage Technologies and used the rotozip drywall bit with guide point and it worked like a dream! We sprayed it with the silicone WD40 and it went perfectly.
We're getting SO CLOSE to being done and we are SO THRILLED with how it looks!!! 🤩🤩
We are hoping to be finished in around 10 more hours. I also realized I'm not dual counting hours where both of us are working on it. I count my hours and then Dan's and then our joint hours as the same so I suppose it's not incredibly accurate. 🤷🏻♀️
Total time spent today: 6.5 hours
Total project hours: 117.5 hours
Showing posts with label hurricane hinge. Show all posts
Sunday, June 10, 2018
Wednesday, June 6, 2018
Day 25-26 Trimming Hurricane Hinge and Installing Luan
Day 25 was a hot afternoon and Dan had a long day at work so we figured out the workings and how to install the door latch and then trimmed our hurricane hinge correctly and drilled holes in the flat bar. Contrary to my prior thought of the 3/8" offset of the galley hatch door, it needs to be more like 1/4". The flat bar was cut so it will sit up against the aluminum molding trim and the other vertical "foot" was trimmed down to match as well. The picture below is how it will be installed.
Total time spent Day 25: 1 hour
Total project hours: 95 hours
Day 26 I finished the interior cabinets (after messing it up AGAIN and installing it backwards 🙄🙄) and NOW it finally is finished.
I used the orbital sander and sanded the galley hatch frame so everything is smooth for when we skin it with the Luan and aluminum.
That took most of the afternoon and when Dan got home we cut more of the radiant barrier insulation and installed two layers between the spar on top of the interior roof.
We purchased a Brad nailer and decided to skin the teardrop with our first layer of Luan (1/8" plywood). No pictures of this part because it took both of us plus our roommate to get it done.
Since our trailer is only 4 foot wide, we decided to bend our luan the long ways so we only needed one sheet to cover from the back where the hatch attaches to the front. We started in the back with everything clamped and released the back clamps on the spar where the hurricane hinge will be and covered about 12 inches back with polyurethane glue. Then, we clamped it back down and use the brad nailer to put in about 15 nails on each spar and along the sidewalls. Then we moved forward and put polyurethane glue along the entire top and then took turns using the Brad nailer to secure the top and then we did the front curve and bent it slowly so the wood wouldn't crack. Once we put a bunch or nails in, it hit us that we FORGOT about all our wiring. 🤦🏻♀️🤦🏻♀️
We figured with all the nails that we had hit the wiring and there was no way to check it so we got a tip from a friend (shoutout to all_i_do_is_hobby on IG) to put in 1-3.5 amp fuses in and connect everything to see if the circuit had shorted. Nothing blew and we measured the current and every wire still showed 12.7v so I think we're okay!! But we probably have nails through our wires...
During that time I got the spar urethane layer on the galley counters to protect them and now all we need is cabinets on the bottom and the galley interior will be finished!
Dan tested all the wiring for the fan, solar, and 12v outlet and none of them shorted. Thank goodness. We really wouldn't have any good way to fix it if it had and that would have been many hours down the drain. Big lessons learned today.
Our interior reading lights have a blue light setting. Cute.
Dome light works and is surprisingly bright! It will work really well as a game light. We will be installing a pull out table under the lower shelf.
We finally have the first roof layer on! It's looking real now! We've passed most of the hard busy work and now it's on to finishing and securing the electrical in the tongue box. We are going to cut a layer of the Luan to install on the front with a hole for the wiring. We figured that would be easier than cutting it in a giant 8 foot sheet of the Luan. We are going to source our aluminum from Wrisco I believe and hopefully get that on Thursday! We've also broken the 100 hour mark!
Total time spent Day 26: 7 hours
Total project hours: 102 hours
Subscribe to:
Comments (Atom)
Day 36: Finishing Touches II
We're still working on some little things. Built a plate holder and tiny silverware box for the cubby in the galley with extra 1/4...
-
We're still working on some little things. Built a plate holder and tiny silverware box for the cubby in the galley with extra 1/4...
-
While we are waiting for our custom mattress to arrive, I decided to take some time to draw up and paint the exterior. I'm not head over...
-
Day 34 I went and got the temporary registration for the state of Texas so we can get it weighed and get the full registration on it to mak...


