Friday, June 29, 2018

Day 34-35: Finishing Touches Hatch Gas Struts

Day 34 I went and got the temporary registration for the state of Texas so we can get it weighed and get the full registration on it to make it road legal. We took it on its first ever drive around the block.


After that we decided to work on the little detail projects we've been putting off. We wanted to install two, 12V outlets, one for the interior and one for the galley. We use a 1" spade bit to drill through the cabinet base and then a sanding dremel bit to widen the hole. The outlet fits and you can plug the car charger type cord up into the bottom of the interior cabinets.


The second 12V charger comes out the back galley cabinet in case we need it for anything in the kitchen. They are run through the solar converter so it should pull from solar power first before pulling from the battery. We tested it and it worked!


Our next project was to get the cabinet doors on. This has been a couple day process as we ran out of 1 1/4" wood screws. In the meantime, I made an attachment piece for the cabinet hardware. I used 2, 1 1/2" wide pieces of 1/2" plywood and glued the faces together. I then made a trim piece out of 1/8" luan to make a pretty face of the attachment point. If that makes sense. It should clear up in the below photos.


While the glue was drying, I checked out Dan's electrical work. He did an amazing job getting everything fitted in the tongue box and he built a battery holder out of wood so the battery doesn't shift around in the box.


Went back to Northern Tool and got a wheeled 1,000 lb jack for the front of the trailer. It's definitely not incredibly stable so we use the jack in combo with some trailer jacks that sit on the ground (plus a bucket) to keep it stable. The jack is bolt on so no holes had to be drilled or anything had to be welded.


Once my plywood pieces were dried, I added the "face" to the thin side that's facing outward.


We cut the doors out of leftover 1/2" plywood. 16 1/2" tall and 23" wide. We kind of winged it and super thankful it worked out.


We used flush hardware so you don't see the hinge and the face of the cabinet is right up against the bottom of the counter. We used the drill press with the 1" spade bit to drill holes like we did with all the other doors on the teardrop.


So glad all that is done. Cabinet builders are insane. That's a tough job. And we had an easy version...


After both the cabinet doors were on, we had $1 latches and just figured out how to make it work for what we wanted it for. We will still need to figure out how to secure the cooler so it doesn't slide around.


Got some cute doormats at World Market.. a llama one and a bee one. I thought we could put our shoes on it so they don't get the inside dirty. A wonderful idea until Dan informed me, "until scorpions take up residence in your shoes." Touche, Texas.


Our solar panel came in! We have a cord house that mounts on for where we drill it in, but it looks stupid so we are going to engineer another way to cover and keep the cords safe and waterproof the area where they go into the cabin. If you have any ideas, feel free to drop them in the comments!


Lastly is the gas struts to hold open the hatch. We've been using a hatch calculator and thought we had it all figured out and then the struts didn't hold the weight of the hatch. We ordered a new pair that are the same size but twice as strong, those should be in shortly.


Total time spent Days 34-35: 5.5 hours
Total project hours: 129 hours

Friday, June 22, 2018

Day 31-33: Skinning the Interior of the Hatch

Days are starting to run together since we are randomly going to the garage and doing a bit of work and then stopping.

Day 31 we skinned the interior of the hatch and let that dry for a day. Took some time to get all the trailer wiring hooked up. We had issues with the ground connection and used the Dremel to grind down the paint in the trailer to get a better ground. It worked and the trailer lighting is complete. We did the install of the tongue box and got all the wiring placed inside and sealed the openings with loctite spray foam.


Day 32 we used the router with our flush trim bit and cut the interior hatch skin flush. Then I had to notch out the hurricane hinge on the top of the hatch so we could seal it so the hatch doesn't shift back and forth after installed.


 Installed it and the hatch DIDN'T FIT. It was a nightmare. We ended up realizing the inner skin had warped it so we quit and took a couple days to figured out what to do.


Day 33 we decided we would route out the areas between the ribs to release the pressure and it actually worked!!!


 It's not perfect but we don't have to rebuild the hatch. We installed the latch and locking mechanism. Now it is officially road ready! Our next step is to hook up the electric to the battery, take it to get weighed and registered.
The last couple weeks have been regularly 100 degrees so it's been so hard to get work done and then we got sick. Just about finished! Still not sure where our first trip will be and not sure what we're going to do with all our free time!


Time spent Days 31-33: 4 hours
Total project hours: 123.5 hours

Tuesday, June 12, 2018

Day 30: Installing Doors & Mattress

AHH we are almost done!! 

Today it felt real. It's mind blowing stepping back and looking at this and thinking, "We BUILT this." I'd like to say we're a good team. I'm an excellent micro manager and Dan is a hard workwr. 😂 But in all seriousness, I think we work well together, his strengths are my weaknesses and vice versa. 

We installed our custom doors from Challenger Doors by covering the edges with butyl tape, sliding them into the sidewall holes, and putting in pan head 1" screws and tightened them until about 25% of the butyle tape squeezed out. Then I took the little scraper and scraped off the excess. Incredibly easy process. We still need to install the rain guards but that involves a self tapering screw. Which we don't have yet. 


Since the fan is installed and we can close off the interior from bugs, we put the mattress in. We ordered a custom size mattress half an inch shorter than the interior dimensions from Love Your Mattress. The customer service there is phenomenal!! The mattress was pre rolled so we were able to unroll it inside with minimal effort. There will be a problem whenever we need to remove it but we'll cross that bridge when we get there.


It's actually crazy comfortable and it's made with natural fibers, no bad chemicals, or by products. 


Not much else to report on, but it looks like it's almost ready to go!


Total time spent today: 2 hours 
Total project hours: 119.5 hours 

Sunday, June 10, 2018

Day 29: Skinning the Hatch Part II & Installing Trim & Fan

Today was one for the books! After getting started, we had our only fluke (the front of the aluminum didn't quite adhere and popped off) but the rest of the day went completely in our favor! We kept working to get tons done.

We cut the 4'x8' aluminum sheet down to roughly the size of the hatch and cut it with the jigsaw. (It worked eons better than cutting the diamond plate.)

After that was done, I applied a liberal amount of contact cement and we let it dry for 15 minutes and then put the aluminum on and clamped it since the strap was being used on the teardrop.


The aluminum had popped up in the front of the teardrop so we took an aluminum trim piece and installed it on top of the aluminum and diamond plate to hold it in place.

We finally got to put on the trim! We first ran butyl tape for a waterproof seal on the edge of the whole side and then place the trim on and pre-drill through the aluminum and into the sidewall. Dan then drove 1 1/4" exterior screws into the molding every three inches. After cleaning it all up and using a scraper to clean the butyl tape that pushed out from under, we added the black trim and we were done with one side.


Knocked out side two in about half hour since Dan had to keep changing bits.

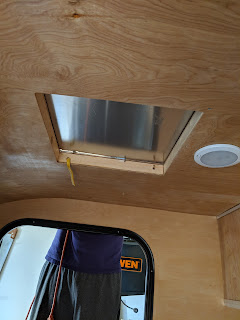
Last step with the roof was to route out the hole the MaxxAir fan is going to sit in. You always need to have air flow in a teardrop as since it's a small, airtight space, it can totally kill you. No bueno.


We used the recommendation from Vintage Technologies and used the rotozip drywall bit with guide point and it worked like a dream! We sprayed it with the silicone WD40 and it went perfectly.


We're getting SO CLOSE to being done and we are SO THRILLED with how it looks!!! 🤩🤩
We are hoping to be finished in around 10 more hours. I also realized I'm not dual counting hours where both of us are working on it. I count my hours and then Dan's and then our joint hours as the same so I suppose it's not incredibly accurate. 🤷🏻‍♀️


Total time spent today: 6.5 hours
Total project hours: 117.5 hours

Saturday, June 9, 2018

Day 27-28: Skinning the Hatch Part I & Putting Aluminum Roof On

Friday we didn't have much energy since I returned from a three day trip and Dan had a long week. The aluminum was delivered Friday morning at so that is finally done with. It's taken forever to try to source the right aluminum for this project. We are going to try to work with two 4'x8' sheets, one for the top and the second for the hatch with diamond plate as a rock guard for the front behind the tongue box. 

We managed to get the Luan on the top of the hatch. We also managed to cut the rachet strap with the jigsaw. (Don't ask.)


That's basically all we did. Big plans for Saturday.

Total time spent Day 27: 2.5 hours
Total project hours: 104.5 hours

Saturday was productive and frustrating. We had a piece of 2'x4' diamond plate that needed to be cut down to 17" and it's a .063 thick plate.

We were recommended the rotozip drywall bit with guide to cut our aluminum so we thought to use it on the diamond plate. We coated the bit with silicone WD40 and suited up.


We got the hole for the wiring to get to the tongue box and then tackled the long cut...and snapped the bit... Twice.


Took some time to switch gears to get rid of the frustration and installed the front panel.
We had to build little blocks and glue them in (no photos) and use the Brad nailer to install along the front of the trailer.


Hot days cause for cold beverages. Wood and aluminum shavings flying everywhere also makes for not tasty beverages.


We ended up going back to Lowes and getting metal jigsaw blades and made the most embarrassingly sad looking cut for the diamond plate. Oh well, it's done.

Once it was done we prepped the roof by adding some sealant and covering the nails that could potentially be through wires.


Next, we applied the contact cement to the front panel first and pressed on the diamond plate and fitted the moulding and realized we weren't going to be able to pre-drill through the holes since the plate was only covering half the holes. Bad news was the plate was currently contact cemented to the front so we ripped it off before it set and decided to take the jigsaw and make a vertical cut. Of course, I cut off too much. So now we're going to have to figure out how to fill a tiny gap later. This is where I realized why people do their roofing where they need to trim it flush because it doesn't leave the quarter inch gaps. Granted, it will be covered by the moulding but it's honestly a huge pain dealing with corners that don't meet in a point.


Contact cement is like runner cement on drugs. We have a box fan blowing out and both had full respirators. This part would have not been possible without them.

After the rubber cement was liberally applied, we got our trusty sawed-strap and a bunch spars and clamped the crap out of it.


Fingers crossed it holds. Tomorrow we should get most of the exterior done!!

Total time spent Day 28: 6.5 hours (with 2 Lowes trips)
Total project hours: 111 hours

Wednesday, June 6, 2018

Day 25-26 Trimming Hurricane Hinge and Installing Luan

Day 25 was a hot afternoon and Dan had a long day at work so we figured out the workings and how to install the door latch and then trimmed our hurricane hinge correctly and drilled holes in the flat bar. Contrary to my prior thought of the 3/8" offset of the galley hatch door, it needs to be more like 1/4". The flat bar was cut so it will sit up against the aluminum molding trim and the other vertical "foot" was trimmed down to match as well. The picture below is how it will be installed.


Total time spent Day 25: 1 hour
Total project hours: 95 hours

Day 26 I finished the interior cabinets (after messing it up AGAIN and installing it backwards 🙄🙄) and NOW it finally is finished.


I used the orbital sander and sanded the galley hatch frame so everything is smooth for when we skin it with the Luan and aluminum.

That took most of the afternoon and when Dan got home we cut more of the radiant barrier insulation and installed two layers between the spar on top of the interior roof.

We purchased a Brad nailer and decided to skin the teardrop with our first layer of Luan (1/8" plywood). No pictures of this part because it took both of us plus our roommate to get it done.


Since our trailer is only 4 foot wide, we decided to bend our luan the long ways so we only needed one sheet to cover from the back where the hatch attaches to the front. We started in the back with everything clamped and released the back clamps on the spar where the hurricane hinge will be and covered about 12 inches back with polyurethane glue. Then, we clamped it back down and use the brad nailer to put in about 15 nails on each spar and along the sidewalls. Then we moved forward and put polyurethane glue along the entire top and then took turns using the Brad nailer to secure the top and then we did the front curve and bent it slowly so the wood wouldn't crack. Once we put a bunch or nails in, it hit us that we FORGOT about all our wiring. 🤦🏻‍♀️🤦🏻‍♀️

We figured with all the nails that we had hit the wiring and there was no way to check it so we got a tip from a friend (shoutout to all_i_do_is_hobby on IG) to put in 1-3.5 amp fuses in and connect everything to see if the circuit had shorted. Nothing blew and we measured the current and every wire still showed 12.7v so I think we're okay!! But we probably have nails through our wires...


During that time I got the spar urethane layer on the galley counters to protect them and now all we need is cabinets on the bottom and the galley interior will be finished!


Dan tested all the wiring for the fan, solar, and 12v outlet and none of them shorted. Thank goodness. We really wouldn't have any good way to fix it if it had and that would have been many hours down the drain. Big lessons learned today.


Our interior reading lights have a blue light setting. Cute.


Dome light works and is surprisingly bright! It will work really well as a game light. We will be installing a pull out table under the lower shelf.


We finally have the first roof layer on! It's looking real now! We've passed most of the hard busy work and now it's on to finishing and securing the electrical in the tongue box. We are going to cut a layer of the Luan to install on the front with a hole for the wiring. We figured that would be easier than cutting it in a giant 8 foot sheet of the Luan. We are going to source our aluminum from Wrisco I believe and hopefully get that on Thursday! We've also broken the 100 hour mark!


Total time spent Day 26: 7 hours
Total project hours: 102 hours

Day 36: Finishing Touches II

We're still working on some little things. Built a plate holder and tiny silverware box for the cubby in the galley with extra 1/4"...